The Most asked question on Google is: How to activate iPhone without SIM easily? So here it is, we have published four possible working methods that can help you to activate your iPhone X, iPhone X Max, iPhone 8, iPhone 7, iPhone 6s, iPhone 5s, and iPad too. As we all know, we cannot use iPhone/iPad without activating them properly. Anyway, have a look at methods and step by step guide discussed below to proceed.
Almost every person in the world owns a smartphone. This is due to its unparalleled features and compatibility. There are numerous companies coming out with their latest smartphones every year! Amongst all these manufacturers, iPhones are considered to be one of the best iPhones in the world.
This is due to its additional features which include security and its own operating system and Security at its best level. However, if you purchase a new iPhone, you cannot activate it without a SIM card.
There are a few methods which you can use to bypass this restriction and activate your iPhone.
However, there are possibilities that your iPhone may not function normally after executing the methods. Thus, we are not to be held responsible for any issues which might come up after executing the methods listed below.
Method 1– Activate iPhone Using iTunes on a computer.
Some prerequisites include:#1. A tool which can be used to remove the SIM tray from your iPhone.
#2. A computer which has iTunes running on it.
#3. An iPhone unlocking service, which will be required only if your phone is not yet unlocked.
Step 1- Connect your iPhone to your computer which has an updated version of iTunes running on it.

Step 2- In a few moments, you will notice an on-screen prompt which will contain the steps which you need to execute in order to activate your iPhone without a SIM card.
Step 3- Once you have executed the steps mentioned in the prompt, your iPhone will be activated without inserting a SIM card in it!
You can now connect it to your Wi-Fi network and start using it just like you use your iPads. Additionally,
Method 2– Activate iPhone Using the Emergency Call
The steps involved in this method are:Step 1- Switch on your iPhone and when you reach the ‘No SIM Card Installed‘ stage, press the home button. You will see an option to make an emergency call. Select that option.
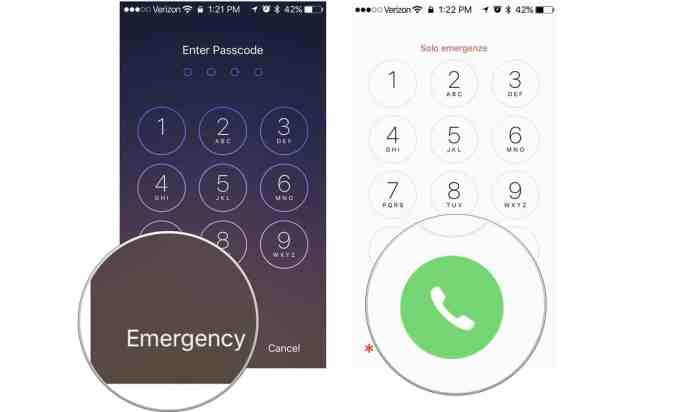
Step 2- Now, make a call to 112 or any other emergency number and, as soon as it dials, press the power button to disconnect the call from going through iPhone Emergency Call Screen.
Step 3- You will notice a few pop-up screens appear on your screen. Click on ‘Cancel‘ to end the emergency call.
Once the emergency call is ended, you will be automatically directed to the home page of your iPhone. Thus, your iPhone will be activated without inserting a SIM card.
Method 3– Activate iPhone Use a borrowed SIM card

This is a very basic method. All you need to do is borrow a SIM card from your family/friends and use it to activate your iPhone. Once your iPhone is activated, you can return the borrowed SIM card and start using your activated iPhone.
Method 4– Activate iPhone Jailbreak your iPhone
This should be the last resort and should be used only if none of the above methods could do the task. However, you must know that your iPhone’s warranty will be void once you jailbreak it.
How to jailbreak with Chimera
Chimera can jailbreak all iOS 12.0-12.1.2 devices, and so a supported device list isn’t necessary. If your handset is running one of these firmware versions, then you’re good to go.
When you’re ready, simply follow the steps below:
1) Download the most recent version of Chimera from the official Chimera website.
2) Download Cydia Impactor on your computer and launch it.
3) Connect your iPhone, iPad, or iPod touch to your computer with a Lightning or USB-C cable (depending on the device).
Note: Cydia Impactor should recognize your device after you plug it in. If it doesn’t, then “Trust” your computer from your computer via the pop-up on your device, and vice-versa. You may need to launch iTunes to do the latter.
4) Click and drag the Chimera.ipa file you downloaded into the Cydia Impactor window like so:

5) Enter a valid Apple ID when prompted to:

6) Sign in with your Apple ID password when prompted to:
7) Cydia Impactor will now begin side-loading the Chimera jailbreak app to your iOS device:
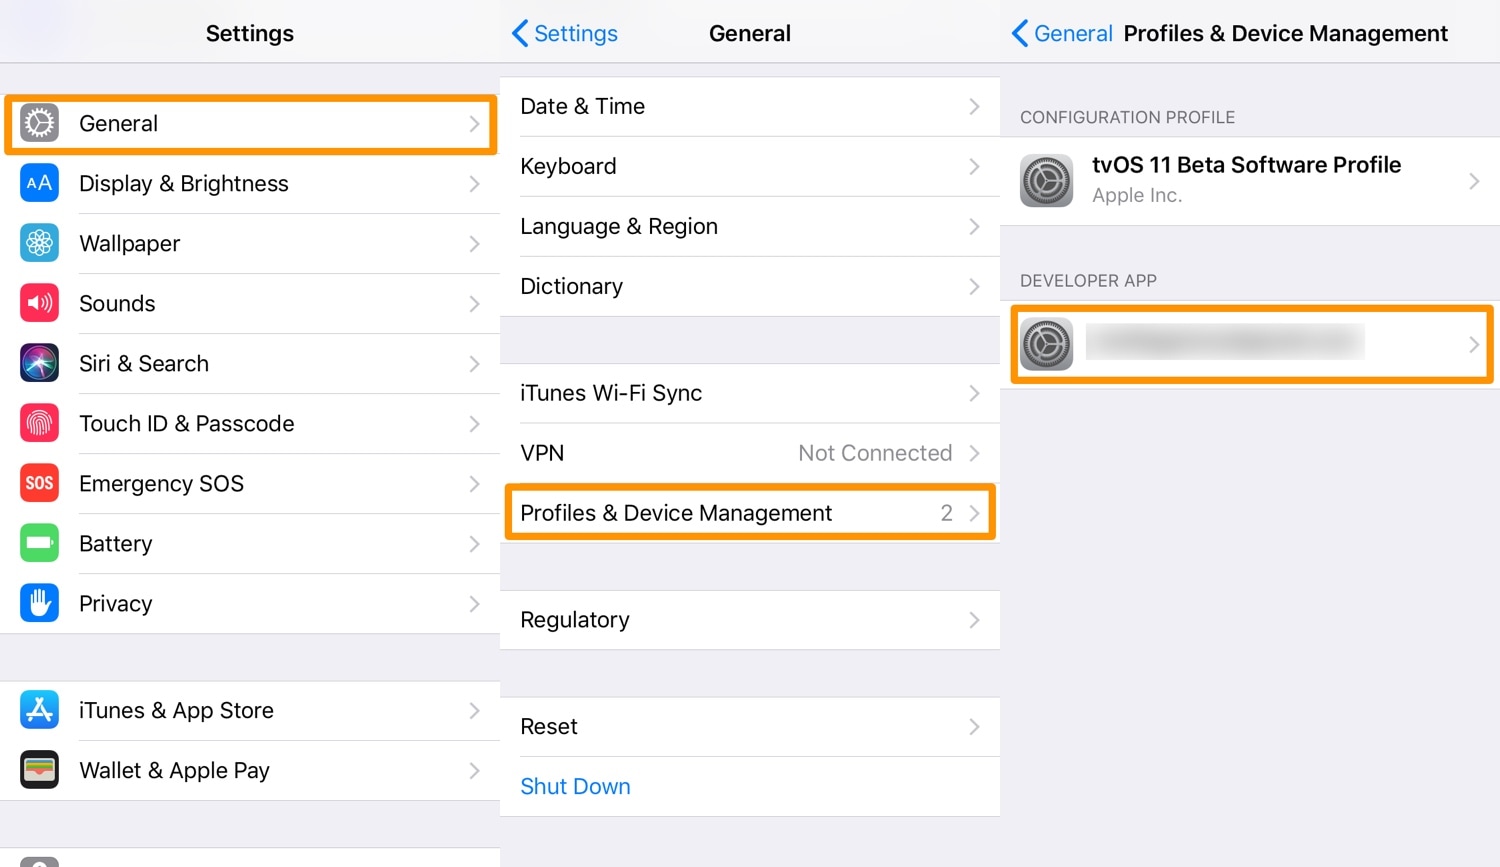
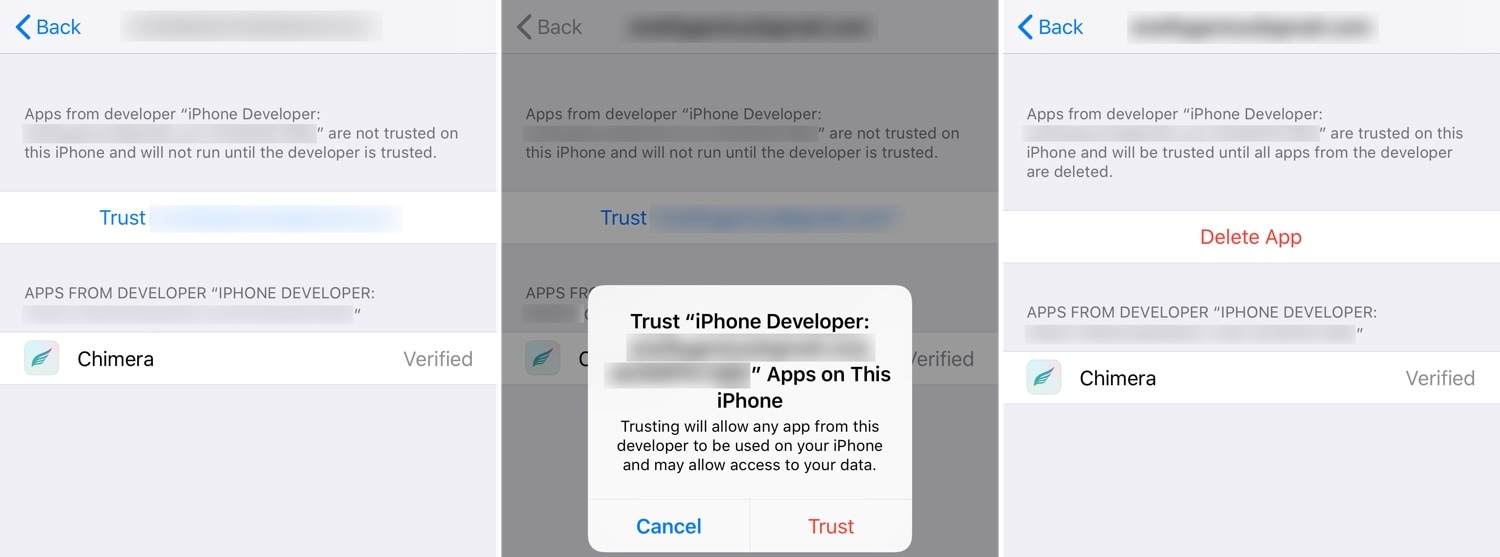
8) Once installed, go to Settings → General → Profiles & Device Management and tap on your Apple ID:
9) Next, Tap on the blue Trust button, and then tap on the red Trust button inside the popup that appears:
Note: Before proceeding to the next step, enable AirplaneMode, disable your passcode/Touch ID/Face ID, disable Siri, and reboot your device. Taking these additional steps isn’t mandatory, but has been known to increase jailbreaking success rates in the past.
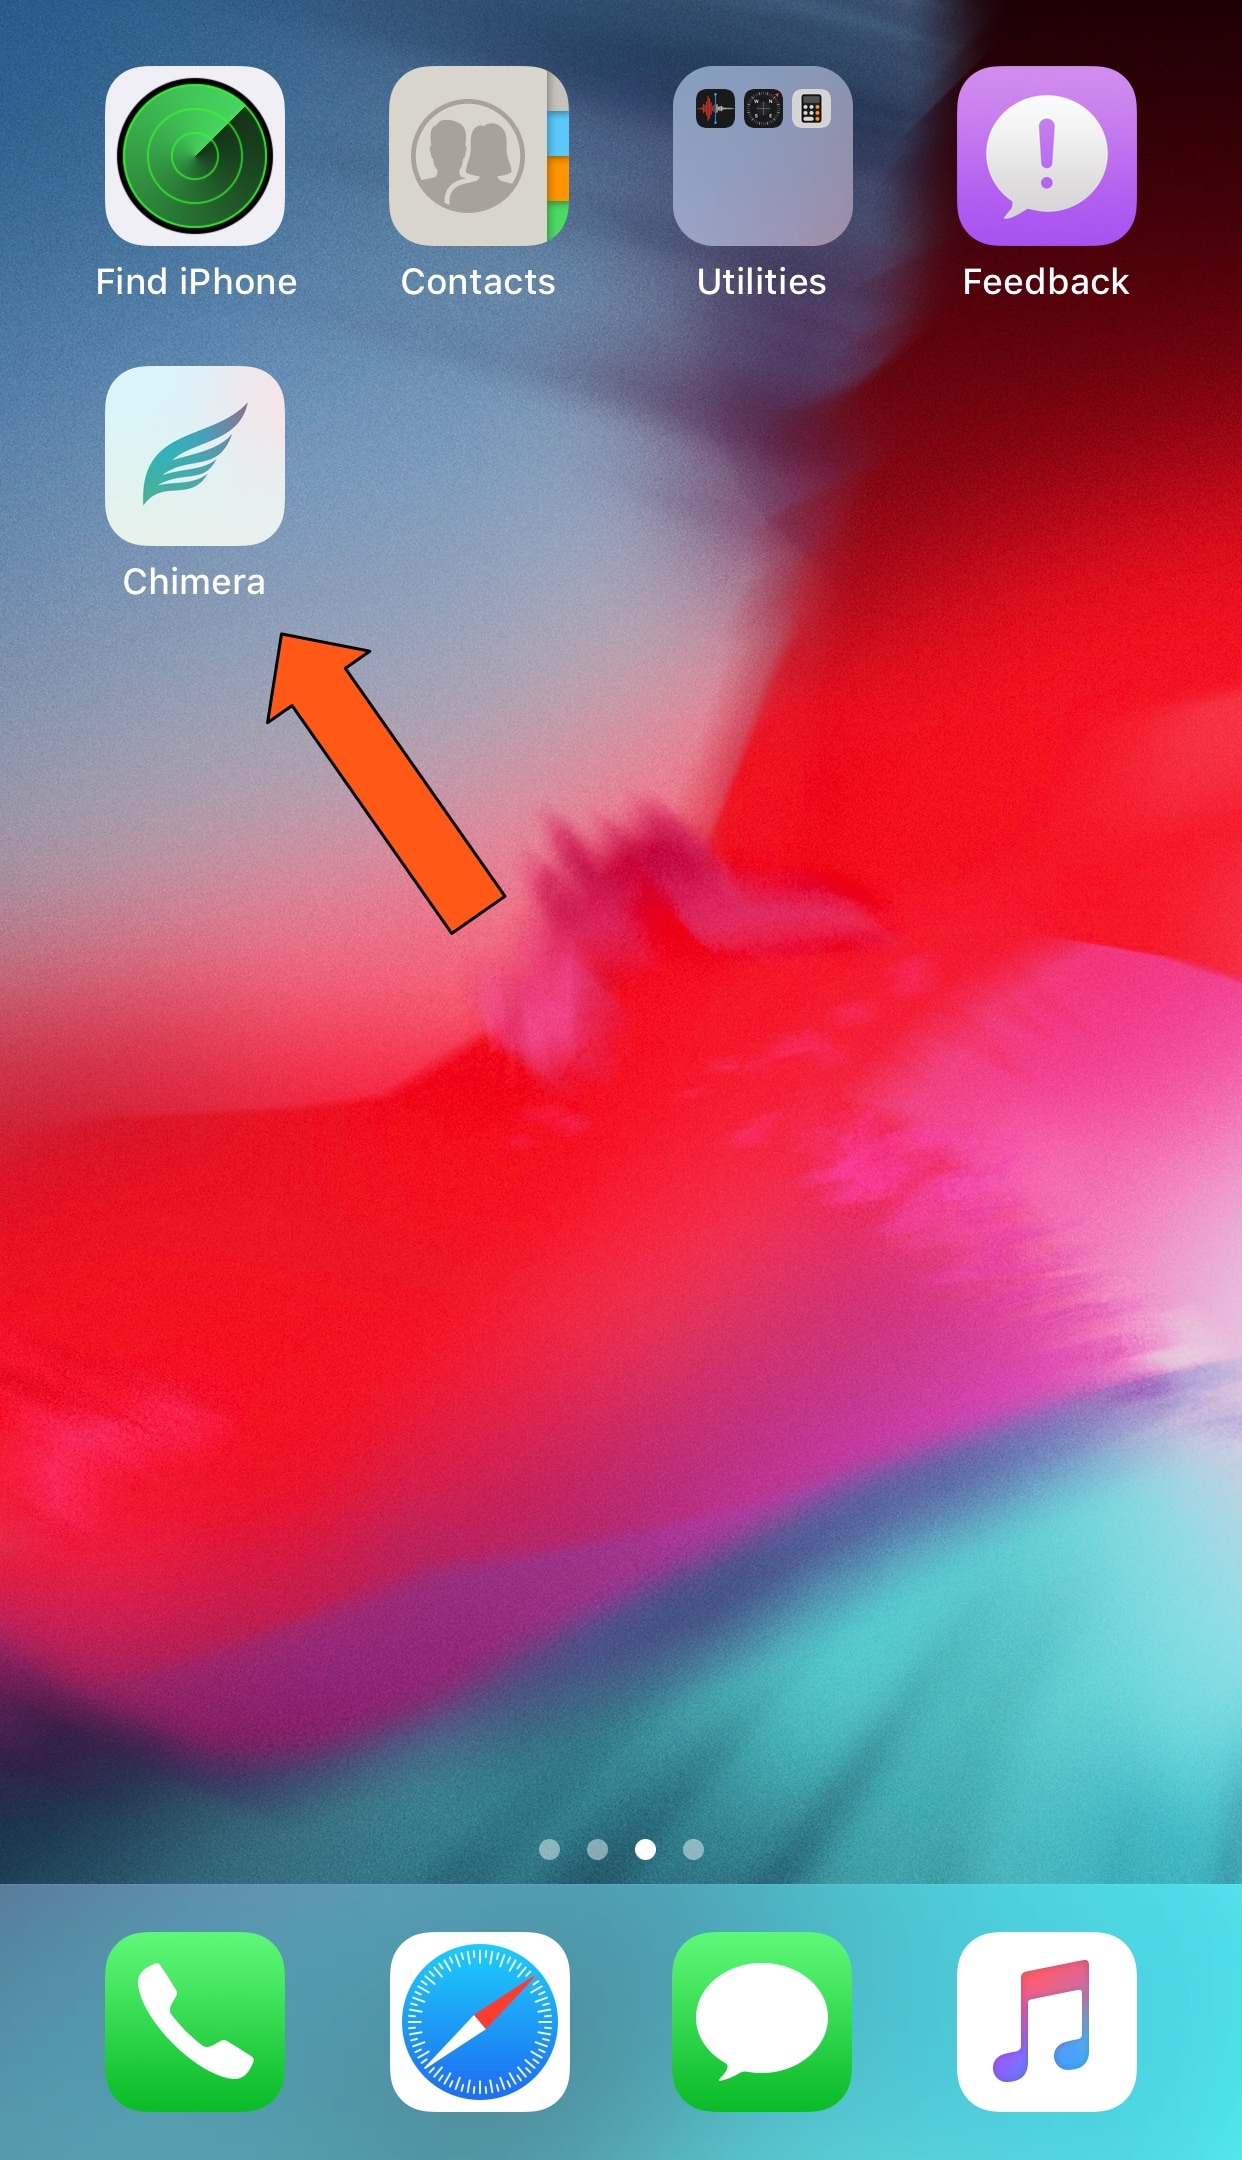
10) After following the recommended steps above, tap on the Chimera app on your device’s
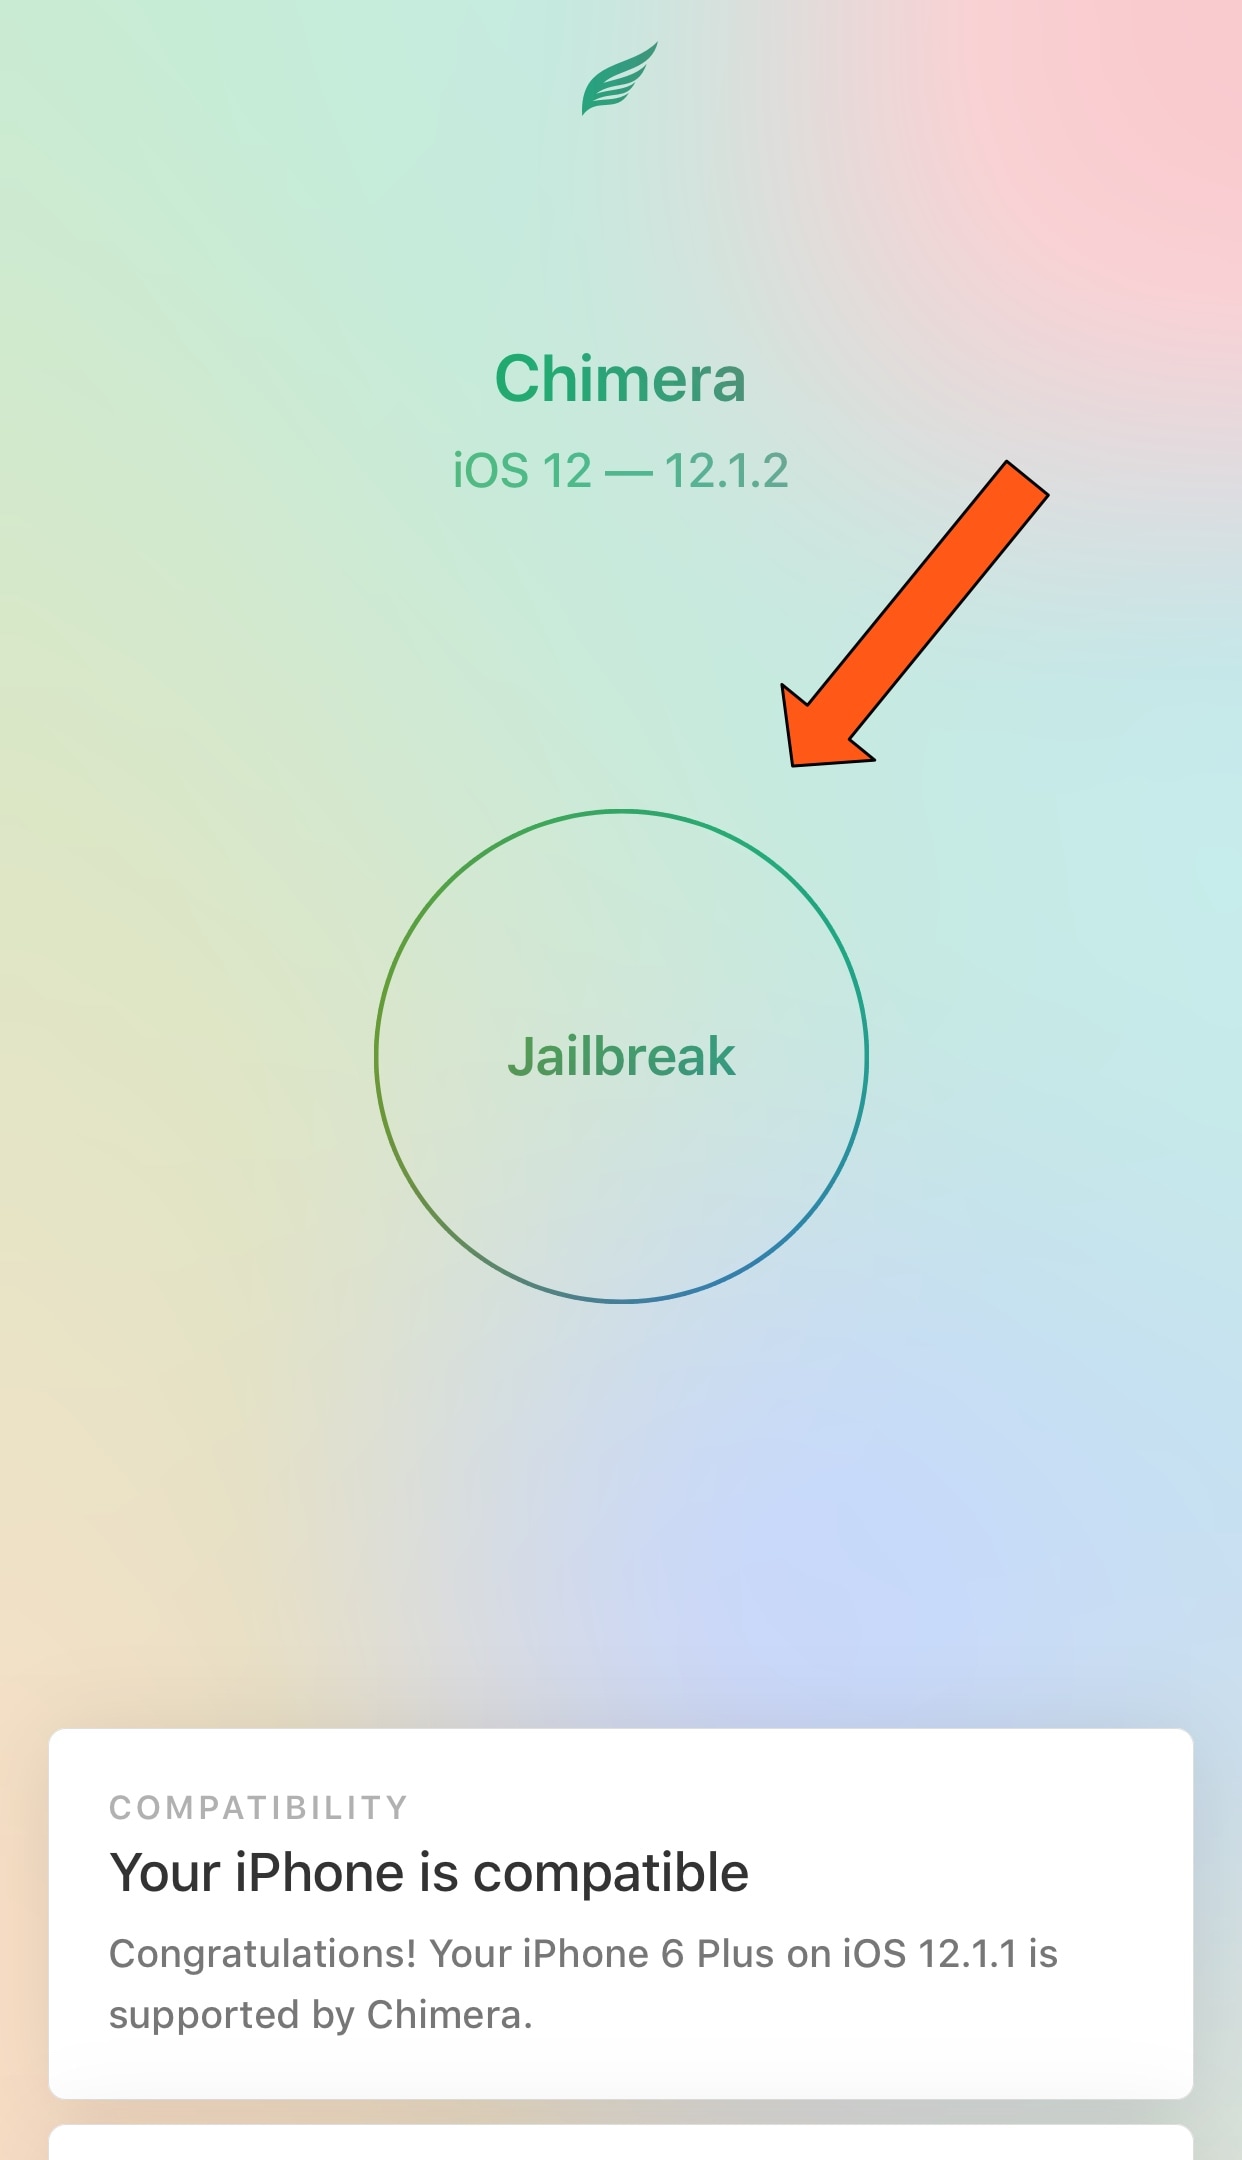
11) Next, tap on the round Jailbreak button in the Chimera app:
Note: the tool will begin jailbreaking your device; it should respring afterward.
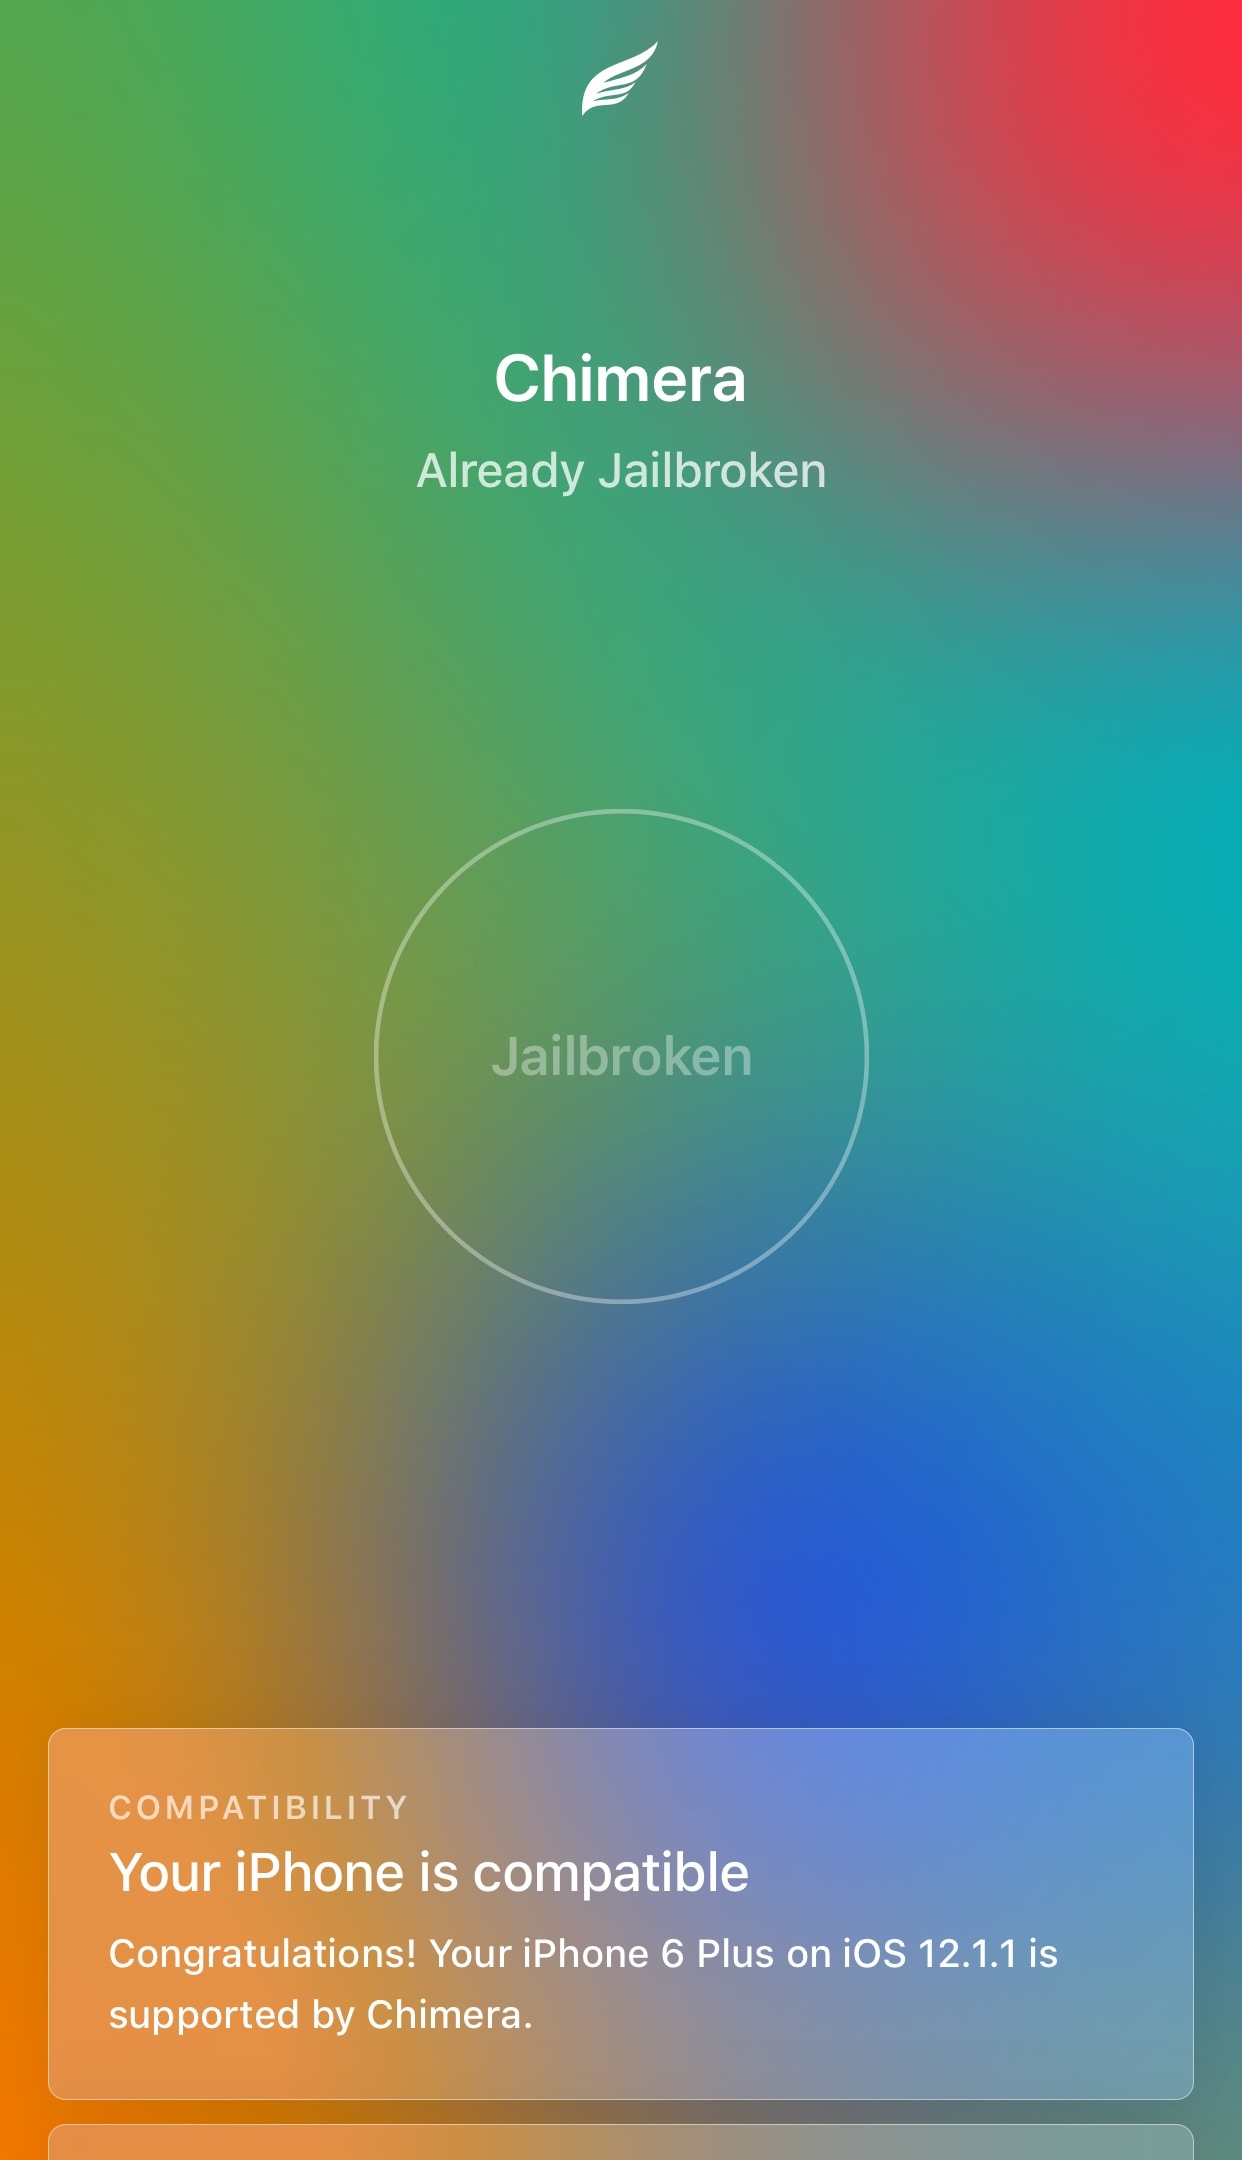
12) Once finished, the Chimera jailbreak app will confirm that you’re jailbroken:
13) Sileo should now be displayed on your Home screen alongside the Chimera jailbreak app:
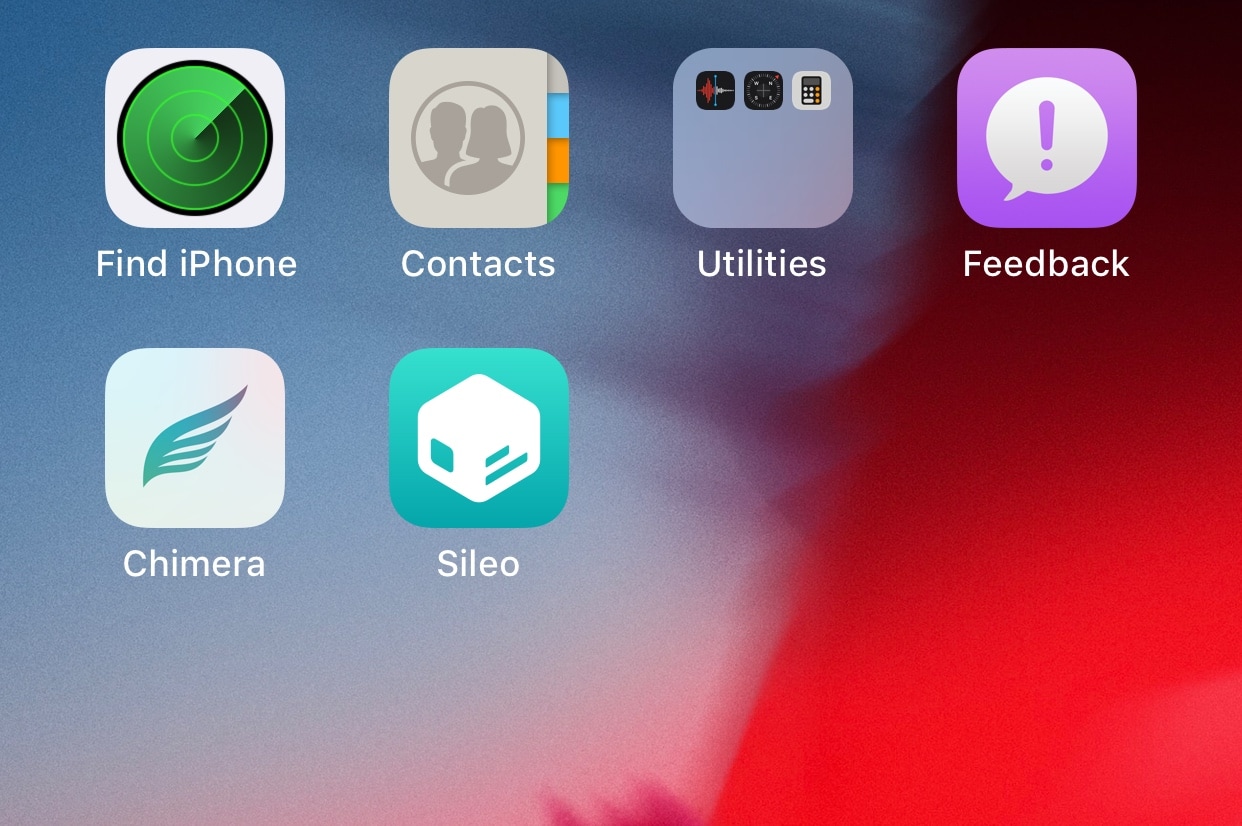
Note: If you don’t see Sileo after jailbreaking with Chimera, then reboot and re-launch the Chimera app and keep trying until it works.
That’s all there is to it. You now have a jailbroken handset by way of Chimera.




0 Comments